Showing posts with label Craft Projects. Show all posts

Wednesday, February 15, 2012

Projected: Stick Art Accomplished!


After a lot of struggling with mono-filament and a bit of craft cursing, I made it happen! The layout isn't pitch-perfect, but after a couple hours of struggling with the display I decided that it will have to do for now.

This project was 100% free, using paint and fishing line I already owned. Mother Nature was kind enough to donate the sticks from the park across the street.

Check out the whole process here and here.


PS- My layout seems to be doing crazy things without my permission, so if you happen to see the Comic Sans font anywhere on here, please know that it is not of my doing! My design taste and skill levels are limited--if not a bit challenged--but I DO know better than Comic Sans and Papyrus thanks to some outspoken design friends of mine.

Monday, February 13, 2012

Easy DIY Drip Art


Supplies:
Water color paper or canvas
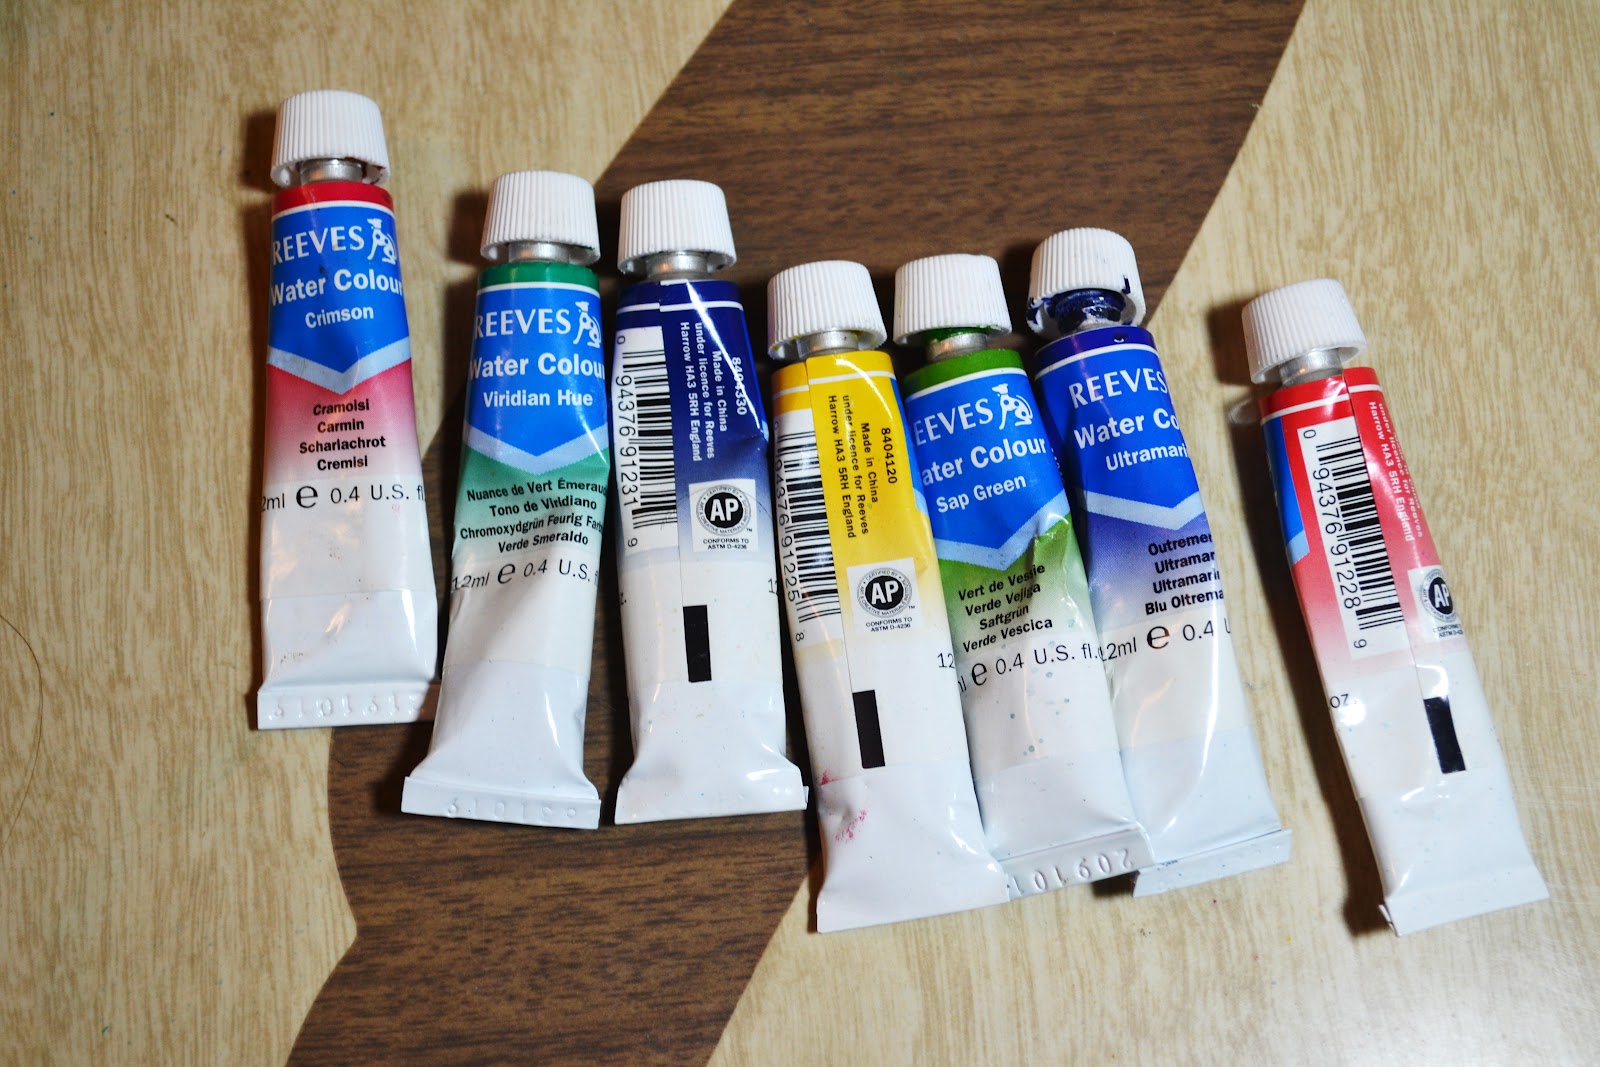
Water color paints (I used Reeve's Water Colour in a tube for more color concentration)
Paint brushes, one for each color or have a glass of water nearby for rinsing
Spray bottle of water
Newspaper or tarp to keep your space clean.


Consider experimenting on scrap paper first. Here is the hot mess of my first attempt, which is already in the recycling:


 Simple steps:
1. With the paper flat on a surface, dampen the top of your paper with your spray bottle. 
2.Add the water colors of your choice in whatever placement suits you.
3.With the spray bottle and a brush, mix each paint with water until the color paste is fully dissolved.
4.Tilt your paper/canvas upright to begin drips. Adjust as necessary: gently (or not so gently) blend your colors together, spray more water, throw some glitter on it, etc.
5.Allow drying time, frame it up, and admire.


Wednesday, February 8, 2012

Reconstructions

Now that my handsome roommate/best friend has returned to school, I have a lot of time alone at home. In the summer I'd go exploring, but I am holing up for Chicago winter, no matter how mild. 

My new sewing machine has been put to work!

After fixing all of the ripped pants in the house--including one pair split by Jake at a party when trying to do yoga while wearing corduroys--I began working on the pile I set aside to reconstruct. Each top is upcycled from materials I already owned.


Vintage blouse, ruched with added blue lace.


Freestyle "quilt" from fabric scraps appliqued to a stained t-shirt I had dyed last summer. This is a new style that I am working to perfect.


Peculiar short sleeved t-shirt/cardigan/jacket, sewed together in the front, gathered under the bust for a little shape, and give puffy sleeves.


I can't wait to do this to more sweatshirts! Tiny vintage sweatshirt turned into a cardigan with a  lace trim. I'm not loving the lace, so I may replace it with some green or white binding. What do you think I should do?

Tuesday, January 17, 2012

Reading List


 The book fairy was kind to me over the past month! For you, a list of what's new on my bookshelf. I heartily endorse each of these titles.

  • Make Your Place: Affordable, Sustainable Nesting Skills by Raleigh Briggs. The "type" and illustrations are all done by hand for a 'zine edge with a radical feel. This is an excellent resource for wild-crafting and making your own tinctures, as well as natural home and health care.
  • The Handmade Marketplace by Kari Chapin. Valuable to anyone who wants to build a presence in today's crafting market. 
  • Made From Scratch by Jenna Woginrich. I haven't read this yet, but I am anxious to get started!  Part memoir and part how-to manual, Made from Scratch recounts Woginrich’s growing independence and the successes and missteps she experiences as she learns to more fully live off the land. By turns upbeat, dramatic, and sometimes sorrowful, her story embodies the experience of the new homesteader  one who is committed to reducing dependence on commercially produced goods while still working a day job to pay the rent. Woven into the narrative, readers will find easy-to-follow instructions for making clothing, playing a musical instrument, preserving fruit, brewing the best pot of coffee imaginable, and much more.  (Synopsis courtesy of Amazon.com)
  • Moby Duck by Donovan Hohn. I haven't cracked this one yet either, but the concept is incredibly compelling! Selected by The New York Times Book Review as a Notable Book of the Year. When the writer Donovan Hohn heard of the mysterious loss of thousands of bath toys at sea, he figured he would interview a few oceanographers, talk to a few beachcombers, and read up on Arctic science and geography. But questions can be like ocean currents: wade in too far, and they carry you away. Hohn's accidental odyssey pulls him into the secretive world of shipping conglomerates, the daring work of Arctic researchers, the lunatic risks of maverick sailors, and the shadowy world of Chinese toy factories. (Synopsis courtesy of Amazon.com)

  • Making It by Kelly Coyne & Erik Knutzen. Written by the couple behind Root Simple and Urban Homestead (which I gifted to Jessica and have heard high reviews). Full of DIYs for the home that go beyond mixing baking soda and lemon juice and venture into castile soap making (with lye!), building your own chicken coops, slaughtering said chickens in a humane way if you so choose, kombucha brewing, and plenty of other truly radical projects. 
  • Bust DIY Guide to Life from Bust Magazine. Clever sewing projects, easy vegan recipes, DIY intimacy ideas for yourself and/or your partner, wedding planning, and even your rights in caring for loved ones when they pass. It's Bust magazine, how could this not be wonderful? And it is.
  • The Cook & The Butcher by Brigit Binns. A meat-oriented cook book from Williams Sonoma, with contributions from Mark Martin. Mark is a family friend, fellow Iowan, and owner of Nelson's Meat Market, a dying breed of classic butcheries. He's an incredibly kind and knowledgeable man, I'm so glad to see him find this success! Below you can see his personal inscription in my book, written after he was told Jake and I eat mostly vegetarian these days.
  • Vegetarian Cooking for Everyone by Deborah Madison. This is the bible of vegetarian cooking. Organized by ingredient, Madison gives detailed information including storage, health benefits, choosing the best fruits and vegetables, and cooking methods, followed by tried-and-true recipes for the ingredient.  This is more of a reference book than recipe book. Have a surplus of tomatoes? Head to the tomato chapter and learn how to make marinara. Want to try lentils for the first time? There's four pages to guide you through the process and make something you'll love. I can't recommend this tome enough.

 To Brooke & Jake
In a weak moment think "BEEF"!
Happy grilling
Mark Martin
Christmas 2011

Tuesday, January 3, 2012

Silhouette Gift

My boss, who you have noticed by now is a cute baby, also employs two of my friends here in Chicago as her parents. The parents have other bosses out in area hospitals where they're finishing their residencies, but we all know who they're really working for. 

For their holiday gift, I utilized my minimal Photoshop skills and turned a photo of The Boss into a silhouette portrait. Note the sweet hair-do, which was 100% natural and un-styled.


You can make one for yourself with this tutorial!

Friday, December 9, 2011

Handmade Christmas

My handsome roommate and I are not religious, nor are we interested in the secular aspects of Christmas. Still, sometimes you just gotta tilt your head at one another, get mushy, and sigh, "Awww, our first Christmas as a family." So, we agreed to set up the tree in our first apartment together. 

The tree has been mine for years and years. I have no idea how long it's been mine, if anyone had it before me, or if I bought it myself (and from where!?). It has traveled from apartment to apartment with me, summering in my mom's garage, always put away exactly as I'd displayed it. I can never be bothered to take off the decorations.

Okay! I'll admit it! It spent about six months in my little Mitsubishi's trunk this year. For no reason but my laziness. Then, after its six-month joy ride, I tossed it into the garage for the summer and left it for dead. When my mom dug it out to deliver when she visited, she rightfully considered throwing it out.

If only I'd taken a before photo. Then, you might be a little more impressed with these:


I don't like spending money on decorations, but I did invest in a couple of strands of LED lights. They're reliable, more energy efficient, and so bright that you need fewer strands. For the rest of the tree, I pulled together some easy DIY tricks and the results made for a damn cute tree. I made up the pattern for the poinsettia/dahlia tree topper, though I am pretty sure there are similar patterns easily accessible online.

And now begins the season of extra-bad cats. Here they all are, waiting for some alone time with the tree:


Tuesday, November 29, 2011

Earrings

Here's a little peak into what I've been up to when not entertaining my boss (she's 7 months old now, by the way--she's mobile!). The pieces are slowly coming together, but eventually my shop will open. And these will find new homes.


1. Burned natural wood earrings.
2. Earrings made of suede scraps.
3. My messy little craft corner.

Friday, November 4, 2011

DIY Ethical Hair "Extensions"


 Do ever you start to feel like maybe you look too "normal"? I suppose it's difficult to blend in much when you have a facial piercing, large visible tattoo, and occasionally wacky outfits...but I started to feel it recently anyhow. 

I'd been considering putting a few bleach-blonde extensions to frame my face, as bleaching my own hair only  ends up it breaking off. BUT extensions are expensive, and human hair travels down a peculiar road that I am not especially comfortable with. Feather extensions, while pretty, are an even more sordid practice on a level similar to fur coats. I'll avoid making this political, but I'll include a few resources at the bottom if you choose to pursue the information. 


These colorful "extensions" were my ethical solution. Quick, cheap, and a craft statement. They took about 5 minutes to put in, and will last as long as I choose to leave them in.

1. Cut a length of embroidery floss (yarn would work too) about twice the length of your hair, 
2. Carefully select a lock of hair about 1/4" square in size, sure to isolate only the hairs you want to braid (flyaways will snag and pull)
3. tie the floss at the top of your chosen lock--as close to your scalp as possible--with the two tails of floss falling at equal lengths
4. Do a simple 3-strand braid! My three strands were the two embroidery floss lengths with my lock of hair serving as one strand.
5. Tie a good knot with your floss at the bottom of your braid. Trim the excess thread at whatever length you choose. I chose to cut my thread tails off completely, but it's equally cute to leave them long.
6. Bonus: add an embellishment, like charms or ethically-obtained feathers, at the bottom. 


Excuse the messy hair, it's my windblown bed-head. Today has been warm and sunny, so walked down to a delicious lunch at Glenn's Diner down the street. Our lovely server stopped me in the middle of ordering to ask about my extensions, then exclaimed, "I'm totally stealing that, and you're going to hate me for it!" Not true! Please, steal my idea! 

If you try out it, send me a photo? 


I'm having a difficult time finding a reliable source for human hair extension information, so rather than link you to something I don't totally trust, I'll recommend you watch
Good Hair, Chris Rock's interesting documentary about hair in the African American community, with a great focus on the sourcing of human hair extensions.

A story from the Seattle Times that explains some of the issues regarding feather extensions.

Wednesday, November 2, 2011

Couples Crafts

Sunday night, Jake and I stayed in with some beers and decorated envelopes for buddy packages. We also did a little leg wrestling and cat harassing. I love living with my best friend!

I have to trick Jake into crafting with science. Note the hypotrochoid set!


Some of these will be filled with wood earrings for buddies, but there are still so many waiting for new ears to hang out with. The offer is still good--let me know if you want a pair!

Monday, October 31, 2011

Happy Halloween! pt 2


 The artichoke and the carrot.

I made the artichoke costume--in two manic afternoons--out of foam scraps from my carrot, and a few other items I already had on hand: construction paper, craft pain, yarn, and hot glue. 

The artichoke was totally free to make, and created from found materials. 

Honestly, I was a little jealous at how well it turned out and almost had Jake wear the carrot.


Happy Halloween proper! This holiday makes me especially friend-sick for my very best pals in Iowa (and one in Europe right now!), but we are making do here in Chicago.

Be safe and remember handmade costumes are always more fun and creative. Not to mention, much warmer than what's become popular for women's costumes...

PS- Check out Carissa's spot-on Peggy Bundy costume, and keep your eyes peeled for a possible Halloween update from my urinal-wearing, costume contest-winning buddy Ramona (seriously!).

Friday, October 28, 2011

Happy Halloween!

It started with a mile walk and thirty minute rush-hour train ride with this awkward box:


There were three of these:


Materials:
White Polyfoam (think: typically colorful foam found in children's craft aisles)
Two orange plastic table cloths
Leftover faux flower stems from this project
Orange permanent marker
E6000, lots of duct tape, and spray adhesive
Small amount of wire (to help hold the stems upright)
Measuring devices
Scissors

Total cost: About $15.00


 This thing is REALLY warm. I plan on being as nude as possible underneath, while still having the option to remove the costume in public and be decent.


Now, let me see YOUR costume!

Happy Halloween! Be safe and ridiculous!

Thursday, October 27, 2011

Crochet Cowl


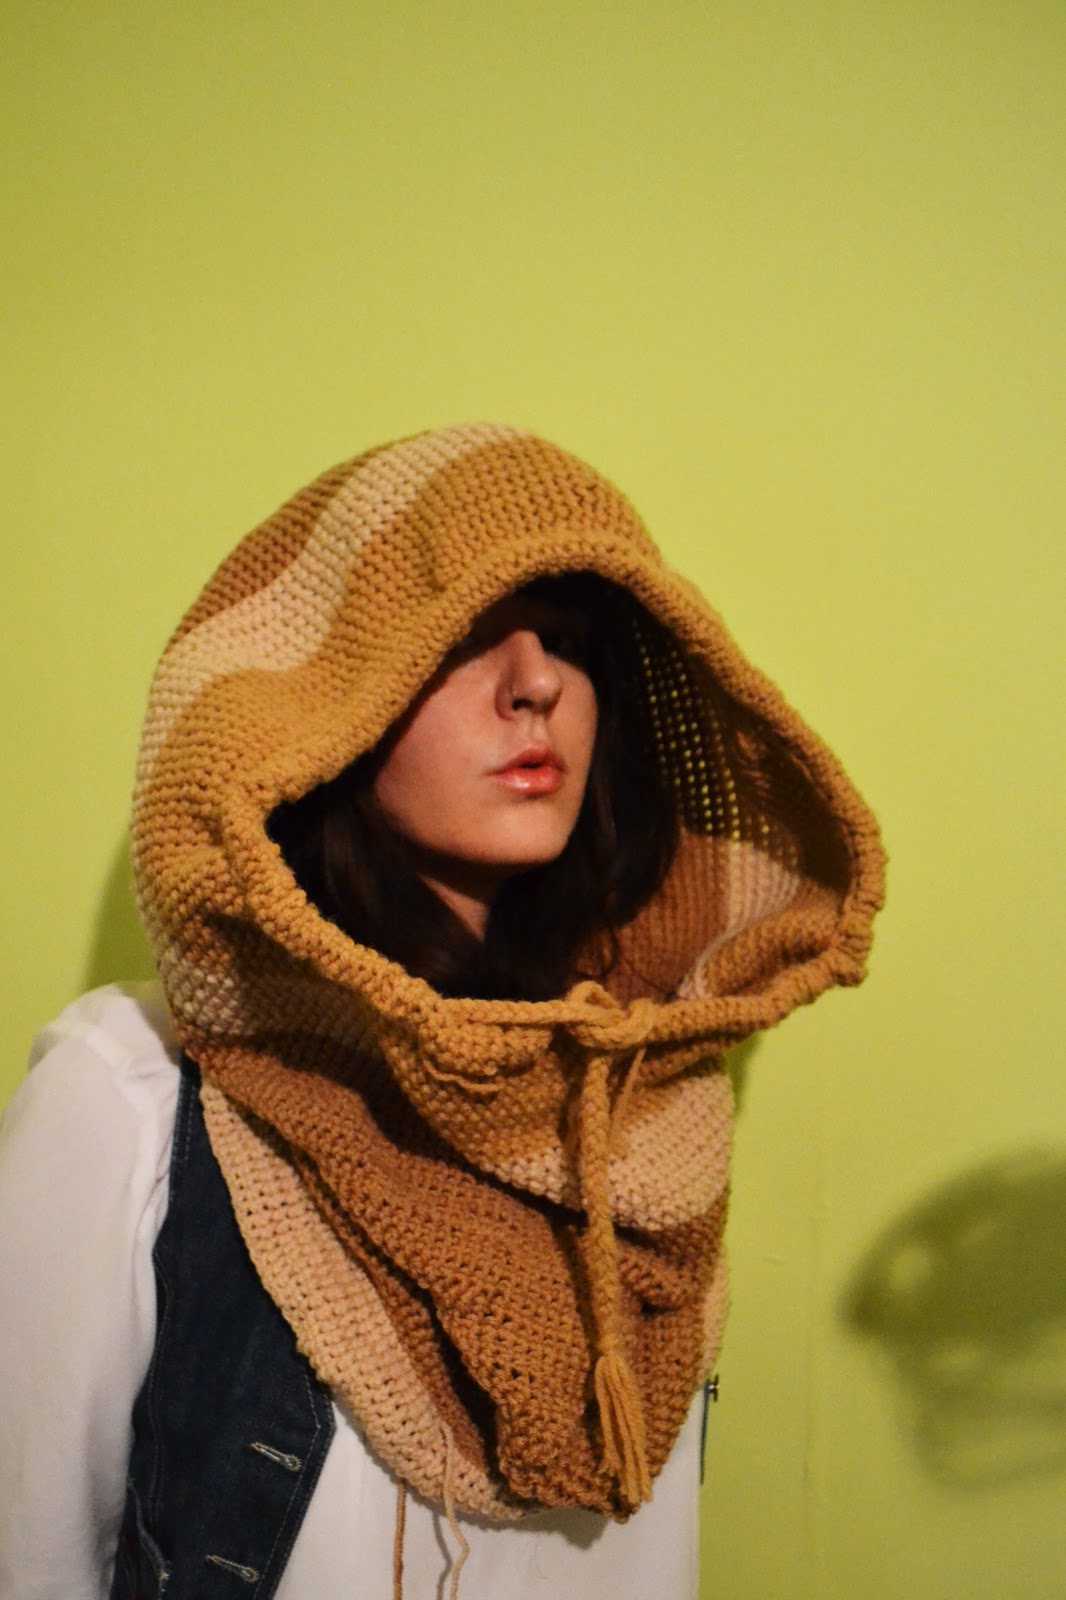
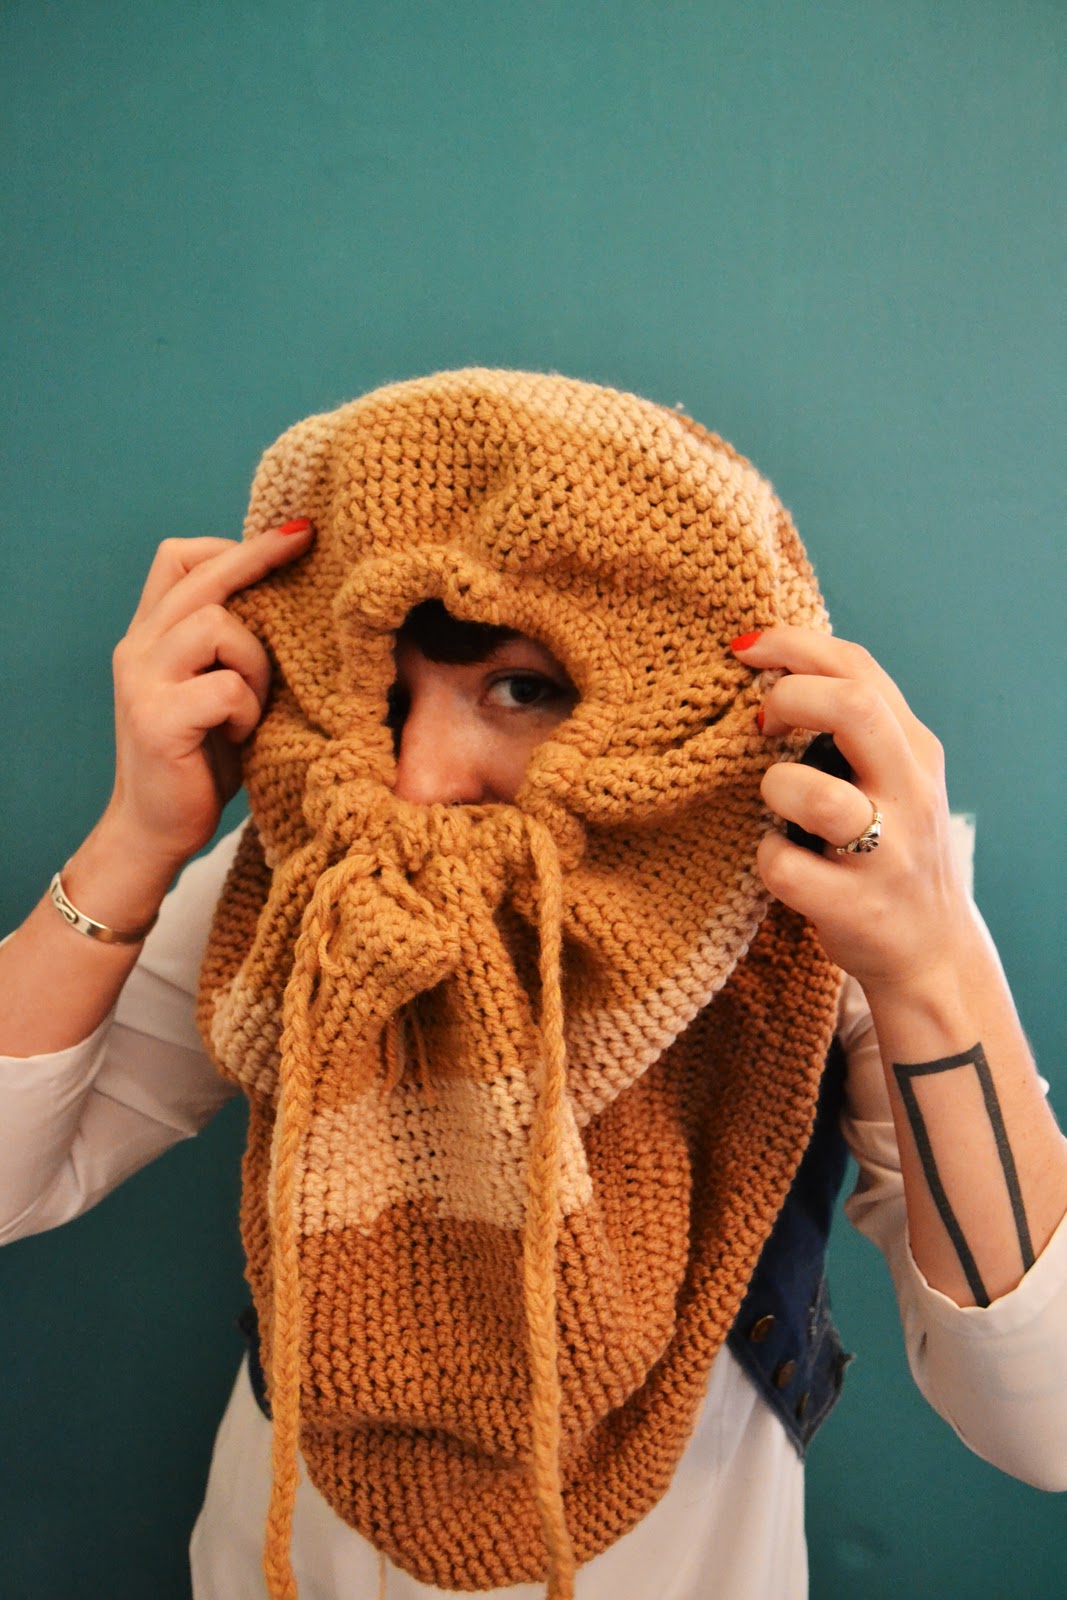
When it comes to crocheting, I am quite an amateur. Somehow I was able to wrangle up some patience and produce this cowl/hood just in time for my first Chicago winter. It took me about a week and a half of feverish labor, and almost three skeins of yarn. The yarn comes from my collection leftover from my Aunt Marlene, an avid plastic canvas crafter and acrylic yarn hoarder. In a dream world, this cowl would be made of softer, more natural fibers, but I cannot bring myself to buy yarn while Marlene's pile fails to get smaller.

Foolishly, I took photos before I trimmed the yarn tails. Forgive!

Can you guess where my color inspiration seems to come from?


Monday, October 17, 2011

Painted Peineta

Remember my peineta  from this post?


Here it is, about 5 hours of meticulous hand-painting later. All that's left now is to varnish and seal, then maybe make myself a mantilla. Then what? Where do I wear this? Is any bride having a lavender and moss green wedding, wanting to look like a Spanish princess? Please, let me supply your hair piece and veil. 


Pages